Welcome to the Newsletter Project. Every Friday You will find the Newsletter Project here. There is one exception. I will be on vacation March 8th to March 18th. However, I am going to try to get a Project up next Friday (March 8th). I have a lot to do before vacation. So keep trying in.
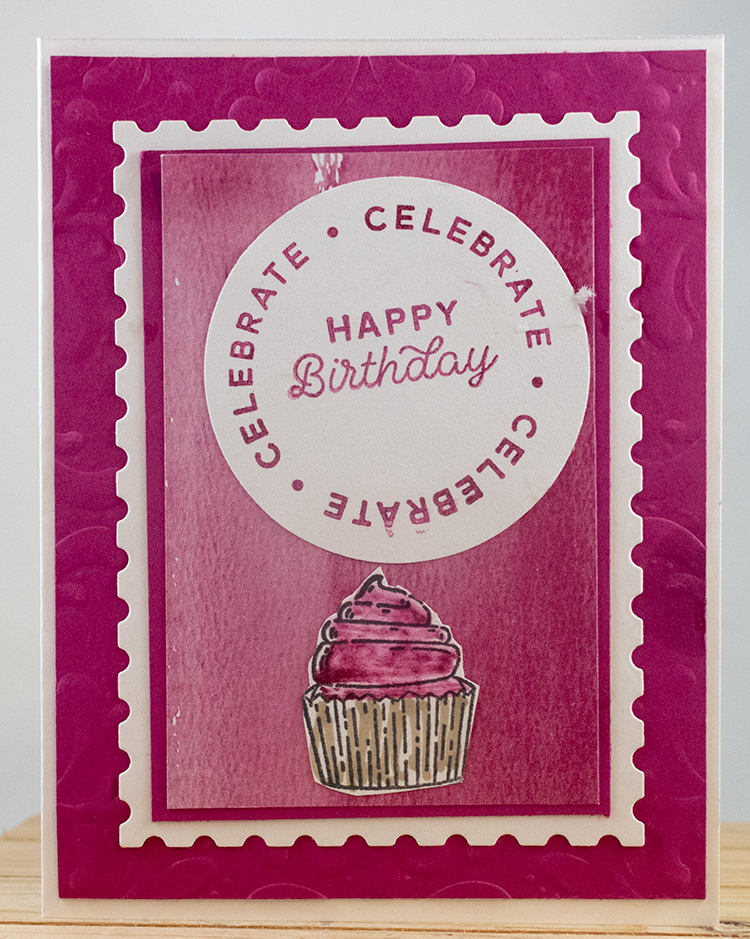
Stamp:
- Circle Layers Bundle -161348
Ink:
- Berry Burst
- Memento Black
Blends:
- Berry Burst
- Crumb Cake
Paper:
- Basic White CS 5 1/2″ x 8 1/2″, 4 1/2″ x 3 1/2″, 2″x 2″ 1″ x 1″
- Berry Burst 5 1/4″ x 4″ , 4 1/4″ x 3 1/4″
Designer Series Paper:
- Bright And Beautiful 4″ x 3″
Tools:
- Perennial Postage Dies
- Layered Floraled 3D Embossing Folder
Basic Tools:
- Trimmer -152392
- Cut And Embossing Machine – 149653
- Multipurpose Liquid Glue – 110755
Instructions:
- Fold Basic White at 4 1/4″.
- Run the Layered Floraled 3D Embossing Folder through the Cut And Emboss Machine with the Berry Burst CS.
- Adhere to the front of the card.
- Run basic White through the Cut And Emboss Machine using the Perennial Postage Dies.
- Adhere to what you just ran through to the center of the card.
- Adhere Berry Burst to the center of the card.
- Adhere the DSP to the center of the card.
- Stamp the words “Celebrate Happy Birthday” on Basic White CS in Berry Burst.
- Adhere to the center to the top of the DSP. (see photo)
- Stamp the cupcake in Memento Black.
- Color the icing in Berry Burst, and the cupcake cup in Crumb Cake.
- Fussy cut the cupcake.
- Adhere to the bottom of the happy birthday circle. (see photo)
CS = Card Stock
DSP = Designer Series Paper